Blinkist

Malwani Chicken


I had seen chicken being cooked this way in a cookery show but did not have the recipe written down. I tried making it using ingredients in my own way. It may not be the authentic recipe for Malwani chicken but tasty nevertheless.


Method

1. Marinate 1 kg chicken with 2 tbsp red chilli powder, 1tsp turmeric and salt for at least an hour before cooking.

2. Cut 2 medium onions roughly, 1/2 cup coriander leaves, 2 green chillies, 10 flakes of garlic and 1 inch of ginger, handful of mint leaves and fry them till the onions turn slightly brown in texture on a pan without oil. Blend them in a mixer to get a coarse paste.

3. Dry roast 1 tsp coriander seeds, 1 tsp cumin seeds, 1 inch cinnamon, 2-3 cardamoms, 4-5 cloves, 3-4 peppercorns. Blend them in a mixer to get a coarse powder.

4. Take oil in a vessel and saute the onion paste for 2-3 mins . Add the chicken and mix thoroughly. Add around 1 cup of water and let this cook for 20 mins or till the chicken is almost cooked. 

5. Now add the dry masala powder and stir well. 
6. Add 1 cup of dahi to give a rich texture to the chicken and cook for 5 mins.
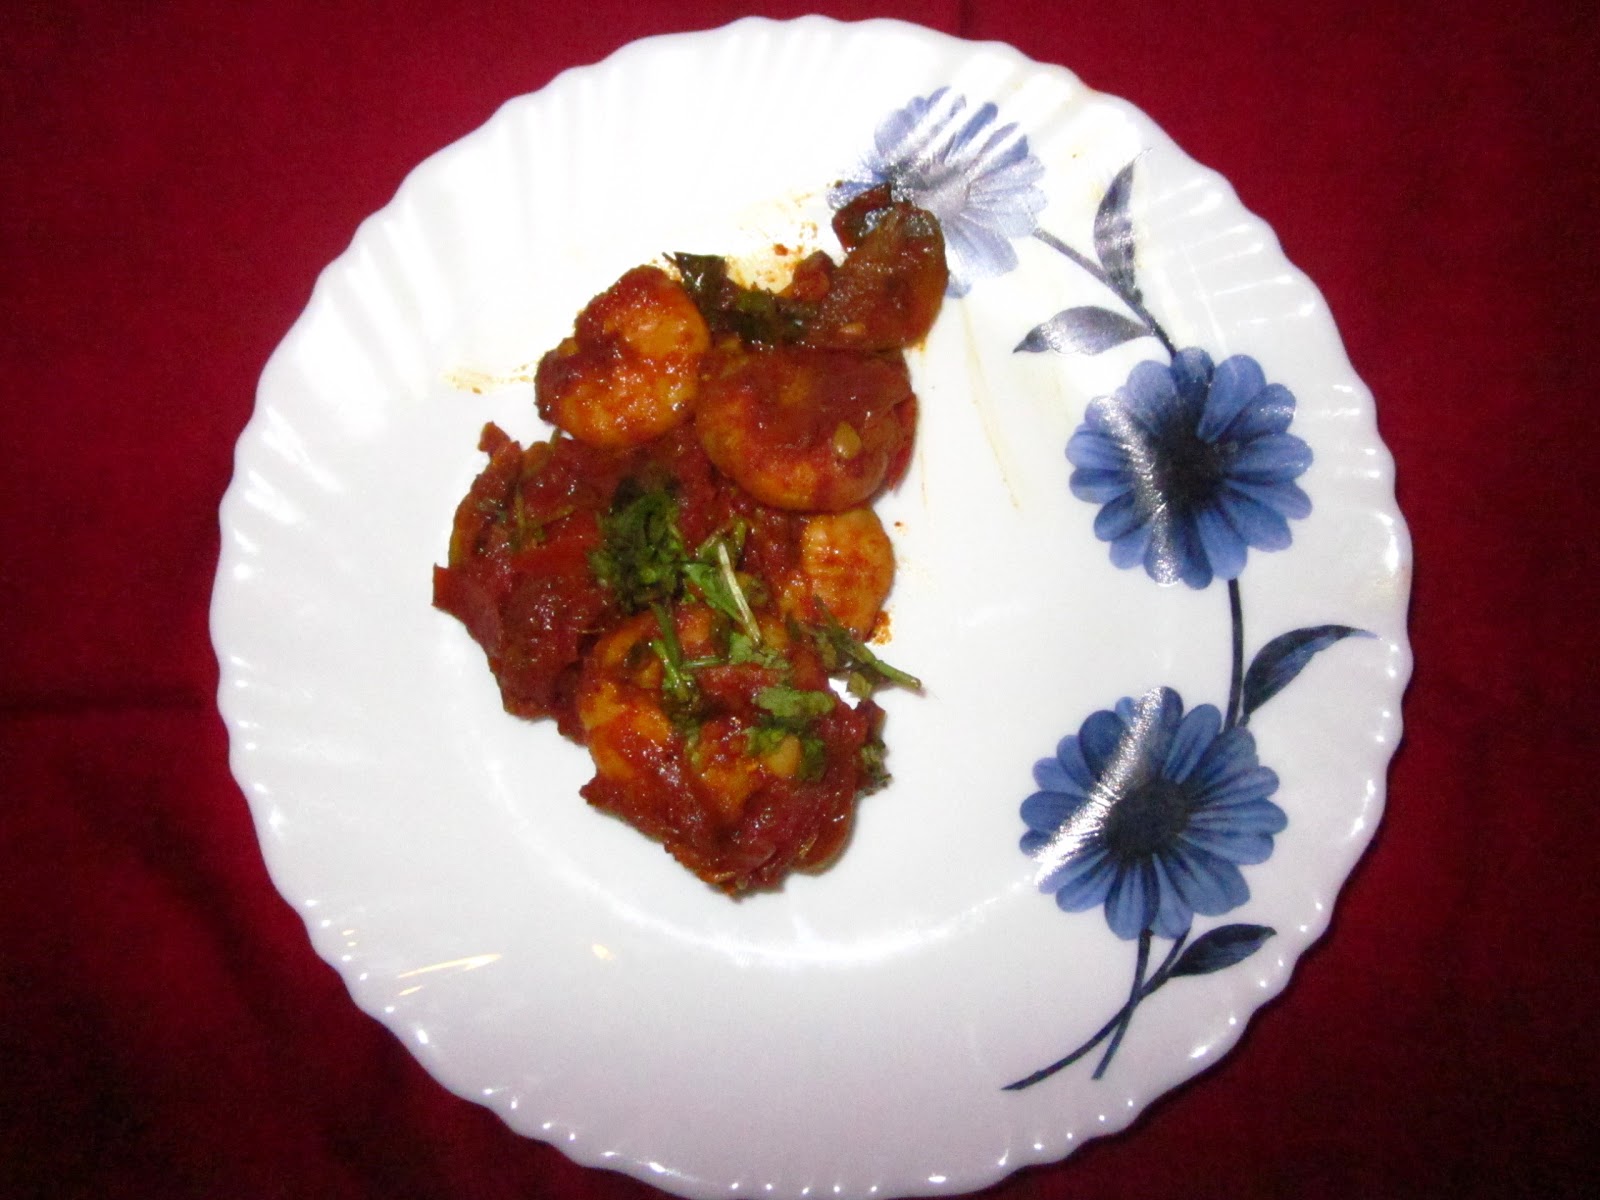
7. Garnish with coriander leaves. 

I made this slightly dry so that it tastes good with rice roti and chapatis. You can try adding more water if you want a gravy to go with rice.


I ate this dish for the first time in a shack in Kerala and fell in love with it. It goes very well with Appam and I cook it very frequently as a side dish.


Method 

1.     Marinate 20-25  prawns with 1 tsp turmeric, 1 tsp chilli powder, ½ tsp garam masala and salt for at least an hour

2.     In a pan, add 2 tbsp coconut oil. Add 2 twigs of Curry leaves, 2 finely diced green chillies, 1 big onion julienne. Add 1 inch of julienned ginger  and 5-6 pods of garlic finely chopped. Add 1tsp ginger garlic paste. Saute all this till the onion is brown.
3.     Add 2 tomatoes finely chopped and sauté

4.     Add 1 tsp coriander powder, 1 tsp garam masala and 1 tsp red chilli powder and cook all this till the oil separates

5.     Now add the marinated prawns and cook

6.     Add 1 tsp tamarind paste for the tangy flavour. Add salt according to taste

7.     Add water to adjust the consistency

8.     Cook for 10 mins on a low flame. Add curry leaves and  1 tsp garam masala just before removing from flame.

9. Sprinkle freshly cut coriander leaves and serve with Appam or rice.


This dish is traditionally cooked using fresh mushrooms which grow naturally during the rains. But since those are not so easily available, I cook it with button mushrooms which are available in the food stores.
However if are lucky enough to get those fresh mushrooms that sprout up during rains, do try this recipe with those...I bet that you won’t be disappointed.

Method

1.     Cut 1 medium sized onion into fine pieces. Cut mushrooms to similar sized pieces so that you have around 2 cups of mushroom

2.     Heat 1tbp oil in a pan and fry 1 tsp coriander seeds, 1 inch cinnamon, 3-4 black pepper, 2 cloves and 3-4 red chillies. Grind to a paste with 1 cup of freshly desiccated coconut and a marble sized ball of tamarind.

3.     In a vessel boil onions and mushroom in water. When this comes to a boil add the above paste and salt to taste and continue cooking. Cook for another 10 mins on a slow flame or till the mushrooms look cooked.
4.     Add 1 tsp garam masala at the end just before putting of the flame.

This dish tastes good with neer dosas, chappatis and even with rice.

Stuffed Okra (Bharleli Bhindi)


I am big fan of okra of bhindi and keep looking for new dishes to make with this vegetable. This dish is one of my favourite Bhindi preparations.

 Method

1. Dry roast 1 tbsp cumin seeds, coriander seeds, 3-4 red chillies, 1 tsp ajwain, 1 tsp seasame seeds (till) and 4 tbsp coconut (you can use  either dried coconut or freshly grated ones)


2.     Grind this to the dry paste. To the paste add 1 tsp garam masala, a pinch of turmeric and salt. I also add a small marble sized ball of tamarind to give it a slightly  tangy flavour.


3.     Wash and clean around 250 gms of okra and let them dry or pat dry them with a towel. Cut off the bottom hard part of the okra and then Slit them lengthwise such that it has 2 vertical slits but don’t cut all the way till the end. Cut it such that it can hold the stuffing.


4.     Add 1 tbsp oil in a non stick pan. Add 1 medium onion finely chopped and 1 tbsp each of freshly chopped ginger and garlic. Fry them till the onion is brown.
5.     Now add the stuffed okras. If you have some masala paste remaining you can that above the okra. Cover and cook on a low flame. This should ideally cook in 10-15 mins.
6.     Sprinkle finely chopped coriander and serve.

Neer Dosa


This is a traditional Konkani recipe and one of my favorite dosas.
We cook this for breakfast but it also tastes very good with traditional Konkani coconut chicken curry. This dish is only easily available in breakfast joints in Karnataka.


Method

  1. Soak  1 cup of rice overnight (We use dosa rice but you can use the normal raw rice too – this can also be made with brown boiled rice)
  2. Grind with salt and ¾ cup freshly grated coconut the next morning( if you can add malai  or tender coconut , the dosas taste even better). The thinner the batter the better – it is much thinner than the normal dosa batter and the consistency should only be slightly thicker than water.
  3. Spread ½ cup of batter on a hot tawa and if possible rotate the tawa so that the batter spreads finely.  Cover and let it cook in the steam for 2 mins. These dosas have to be cooked from only one side.
  4. Serve with coconut chutney
For the coconut chutney

Heat 1 tsp oil in a vessel, Add 1 green chilli, 1 pinch of asafoetida  and fry for a minute. Grind this with one cup of freshly desicated coconut and water to a thick chutney consistency.


We also add ½ cup of watermelon whites (the portion below the red edibile part of the watermelon) This gives a nice pinkish texture to the dosa and tastes good.


I have to confess that I am not a big fan of chocolates...I know that makes me a weird person :). The only form of chocolates that I devour eating is the caramel and peanut butter variety. Snickers has been my favourite chocolate ever since I tasted it.
I had bought this peanut butter jar from the market but somehow did not like it with my sandwiches. It was lying in the fridge since almost 6 months now. This Sunday while spring cleaning, I came across the jar and then decided to look for recipes online to finish it off.
After being inspired by the numerous recipes online, here is my recipe for Peanut Butter Bars.

Method
  1. Take a glass bowl and melt ½ cup of butter with ½ cup of peanut butter in the microwave for 1 minute. You can melt it on a pan too on the stove 
  2. Take 8 Marie Biscuits (I used Sunfeast Marie) and frind them to a coarse powder in the mixer.Take ½ cup sugar and grind them in mixer 
  3. Now fold in the powdered marie biscuits and sugar. I also folded in ½ cup white oats in an attempt to make it healthier ;) This is how the mixture looks at this stage.


4. Take a baking try or an aluminium plate and grease it with butter.


5. Now pour the above mixture to form the first layer


6. Again in a glass bowl, melt 1 cup chocolate chips with ¼ cup butter. Mix well and spread on the first layer. I did not have chocolate chips and as a substitute I added ¼ cup cocoa powder, 1/4 cup milk powder, ¼ cup castor sugar and ¼ cup milk. Whisked them well and spread it on top of the first layer


7. Refrigerate for an hour. Cut into slices and serve.


The above measurements make about 20 one inch square pieces of chocolate.

Tibetan Veg Thukpa


Whenever I travel, I make it a point to mostly eat the traditional recipe of that region. I do not like ordering the usual dishes which I can eat in my hometown when travelling. When I visited Sikkim and Ladakh, we ate a lot of Momos and Thukpas everywhere. One taste that lingered is that of Thukpa….this dish comes close to Maggi cooked with vegetables.

Hubby and me had an adventure when we visited Pangong Tso lake - We had planned to stay on the banks of the lake however the weather did not permit the stay and hence we had to return back. It was impossible to have reached Leh that night and hence we had to look for accommodation for night stay. All the rooms were booked in a small town of Tangtse and we were forced to stay with a family in a home-stay. Here I saw the lady of the house cook this dish and liked this wholesome meal.


Here is my version of Tibetan Veg Thukpa – this serves two people


Method

  1. Heat 1 tbsp oil in a pan
  2. Add 4 cloves of finely chopped garlic
  3. Add 1 inch of ginger chopped into juliennes
  4. Add 4-5 spring onion whites (that is only the onion part) and saute
  5. Add 1 potato diced into cubes. Add 1 tomato finely chopped and saute
  6. Add 1 dollop of butter (yak butter is used in Ladakh but we can add Amul butter :) )
  7. After 5 mins, add 1 tsp garam masala, a pinch of haldi, 1 tsp red chilli powder and salt. Cook for 2 mins
  8. Add 2 cups of noodles (I mostly cook with maggi without the seasoning that comes with it)
  9. Add veg stock or water according to your taste. I like this like a soup and hence add more water
  10. Cover and cook till noodles are almost done
  11. Add 1 tsp soya sauce, a bunch of Palak roughly chopped and handful of spring onion greens roughly chopped and cook for 2 mins
  12. Add freshly ground pepper and adjust salt if needed.

Hubby and me like to eat this soupy dish when we return from office all hungry and yet want to retain our appetites and hence I make it in small quantities. I particularly like this dish because of the palak in it. The palak gives the dish a very different flavor than normal veg maggi.

Recently I was part of a chain mail series with a difference. A friend emailed me about a recipe Exchange program where you email recipes back to the sender and then send the same email to your friends asking them for quick recipes.
My dear friend Nisha sent me this recipe. Though I like potato wedges a lot, I had somehow never ventured to cook it as I always thought that it needs an oven. I really liked this recipe. Quick and yummy.


Method
  1. Slice potatoes into slim wedges (leave the skin on for extra crunchiness. Place in water for 10 mins to get rid of excess starch, drain and leave to dry
  2. Heat 2 tsp of oil in a pan to medium heat. Add 1 tsp of jeera and around 1 twig of curry leaves
  3. Add 1 tsp each of coriander powder and chilli powder and a pinch of turmeric powder and cook it but don’t allow it to burn
  4. Add the potatoes before the masala burns out and add salt. Cover with a lid and let the potatoes cook on a small flame to about 75%
  5. Add 1 tbsp seasame seeds and cook without lid. Add 1 tsp garam masala when the potatoes are fully cooked
  6. Spike the heat up to crispen the potatoes (dont burn ;))
  7. You can choose to garnish with Coriander leaves 


This recipe is ideal for a quick snack. You can replace the Indian spices with chilli flakes, pepper and some oregano.

This dish is my creation from different Andhra recipes that I have tasted.


Method
  1. Marinate prawns (after removing the shell - I use smaller prawns for this dish) with ginger garlic paste, lemon juice, tamarind paste and salt for atleast an hour before cooking
  2.  Take 2 tbsp oil in a pan(Andhra dishes are high in oil but I add less of oil and use a non stick pan instead)
  3. Add 1 tbsp cumin seeds, 1 tsp mustard seeds, pinch fenugreek seeds, 3-4 dried red chillies, 2 medium sized onions (cut them into long and thin slices) and 2 twigs of curry leaves. Saute on medium heat till onions are pinkish.
  4. Add 2 chopped tomatoes and sauté.
  5. Add 2 tsp red chilli powder, 1 tsp cumin powder, 1 tsp coriander powder, salt and sauté till the oil separates
  6. Now add a cup of tamarind water. You can make this by boiling tamarind in water.
  7. Add the prawns and cook for 10 mins on slow flame. Prawns cook easily to see to it that you don’t overcook them
  8. I add a pinch of sugar to balance the sourness in this dish
  9. Garnish with coriander and serve with rice
Andhra cooking is high in chilli, salt and tamarind. I don’t like too much chilli in my cooking and hence have not added much. You can add more if it suits your taste. You can replace prawns with boneless chunks of fish too.

Salted Harbhara


Harbhara is a vegetable which is available only in the winters. The process of removing the shells of the pea itself takes time but there is some fun in searching for the peas and then deshelling and eating them. Though the seeds cab be eaten just like that, my mom used to make this for us which I used to like more than raw chickpeas. This is too simple a dish to write about but tastes yummy
  1. Take 2 tbsp ghee/oil in a pan. When hot, add harbhara (green chickpeas) and sauté till slightly brown. Add salt to taste
The ghee gives the dish a richness which lingers on.
This is how Harbhara looks when removed from stems


And this is how it looks after cooking


Simple Garlic dal


This was a dish that my cousin sister taught me. It is a quick way to cook Dal and is ideal along with fish fry which is a staple in Konkani cuisine.
Method
  1. Cook 1 cup Toor Dal with a pinch of turmeric and 2 cups of water in a pressure cooker
  2. Once the Dal is cooked, heat it on medium flame. Add salt to taste and mash the Dal. The consistency of Dal should be slightly thicker.
  3. In a Chaunk/seasoning  pan add 1 tbsp ghee, Add 2-3 red chillies and 5-6 flakes of garlic mashed a bit. Fry till garlic is slightly brown and add it to the Dal and cover with a lid.
  4. Serve hot with rice

Bisi Bele Bhaat


I love one pot dishes as they are easy to cook.
Bisi Bele Bhaat has been a personal favorite dish since years but we never tried it at home. I always thought of it as a complex dish because of the sheer mix of spices and hence used to order it frequently at Udipi restaurants. So on a lazy Sunday, as I was browsing the internet for a one pot dish, I stumbled upon this dish and thought of cooking it. It took me less than one hour to cook this but the flavours in the dish are amazing and so worth the effort.

Here is the recipe I followed.


  1. Take 2tbsp of ghee/cooking oil in a pressure cooker
  2. Add 1 tbsp of mustard seeds, 1tbsp cumin seeds, 2 dried red chillies, 1 onion diced into cubes, 2 green chilli slit in the centre, 2 twigs of curry leaves and then 1 pinch of asafoetida in that order on medium flame.
  3. When onion is slightly brown add 2 teaspoons of ginger garlic paste
  4. Add 1 carrot, around ½ cup of cauliflower, ½ cup of beans, ½ cup of peas, ½ cup of okra, 3-4 small sized brinjal all diced into ½ inch cubes. No fine cutting required here as the vegetables melt down in this recipe.
  5. Add a pinch of turmeric as you sauté the vegetables on medium flame
  6. After 5 mins, add 1 cup of toor daal (which has been pre-soaked in water for half an hour after draining the water) and 3 cups of rice (again soaked in water for half an hour and drained)
  7. Add 1 tomato diced into cubes


8. Add water (quantity should be so much that there is one inch of water on top of the rice).I like it a bit runny and hence added a lot of water

9. Cook on medium heat for at least 2 whistles

10. Once you put of the pressure cooker, wait for the pressure to ease and open the lid. Add 1 cup of tamarind water and 5-6 tbsp Bisi Bele Bhaat masala(see below).Adjust the water if needed according to your liking.

11. Cook some more till the masalas are well dissolved
12. Garnish with freshly chopped coriander. Serve with raita and papad.


Method of the Bisi Bele Bhaat masala
Dry roast 6 dried red chillies, 1 tsp fenugreek (methi) seeds, 1 tsp mustard seeds, 2 inch cinnamon, 5-6 cloves, 1 teaspoon cumin seeds, 1 tbsp coriander seeds, 2tbsp chana dal and 2tbsp urad dal on low flame. You can add pieces of coconut around 1tbsp to this. Once you can smell the spices and they are little brown, grind the powders to a coarse paste.


This dish can serve 6 people. One can experiment with the vegetables but brinjal gives this dish a distinctive flavor and hence don’t miss this ingredient

Recipe inspired from Vahrevah.com

This is my favorite pickle made my by grandmother. I love it so much that I eat it more like a side dish than a pickle.
This pickle needs to be refrigerated else it spoils quickly. The best part of this pickle is its crunchy texture and to retain it we make smaller quanities and finish it off within a few days. Hence don’t make a lot of it at one time – the recipe is simple and you can making it again quickly.


Method

  1.  Take1 Cup finely chopped carrots (the orange variety) and 1 cup of finely chopped cauliflower (the vegetables should not have a trace of water - for this after washing the vegetables dry them on a towel/paper before cutting). Add salt and 1 lemon juice to it and keep aside for 2 hours
  2. In the meantime, boil 1 cup of water and soak 4-5 dried red chillies for half an hour. Remove the chillies from water when soft and grind it to a thick paste with a pinch of turmeric, 1 tsp of mustard seeds, 1 generous pinch of asafetida. Use very little water to make this paste
  3. Add the above mixture to the cut vegetables. Adjust the salt and leave overnight outside
  4. Refrigerate it the next day after the vegetables taste pickled.


You can add half a cup of tendli to the vegetables (tindora in hindi /ivy gourd in English) if you like it. It gives a crunchier texture to the pickle. I  also add 2-3 tsp of finely chopped ginger or mango ginger since I like the taste of ginger in the pickle. The red chillies can be substituted with plain red chilli powder if you are in a hurry.

Chicken 65


This dish was always on the menu at restaurants, but I somehow had never tasted it before moving to Hyderabad. But once I tasted this dish here it has become one of my favourite starters. I always wondered why is it called 65 and not any other number. One explanation was that it required 65 ingredients and hence I set out to find the recipe to see if it is actually that complex. I found the best recipe on vahrevah.com and also the simple explanation. Chef Thumma says that this was the 65th dish on the menu card of a restaurant in Chennai and hence the name. Tried this recipe out for starters and found out that its not a difficult dish at all to prepare. It actually tastes very good and comes very close to what we get in restaurants.

Here is the recipe that I followed


  1. Marinate boneless chicken for an hour with salt, 2 tbsp ginger garlic paste and 1 tbsp pepper. I always make fresh ginger garlic paste when I have time instead of store bought one – adds a fresh flavour to the food.
  2. After an hour add 2tbsp cornflour, one egg and mix. Deep fry the chicken pieces in oil. See to it that the pieces don’t stick to each other. Drain and keep aside. The chicken pieces taste so good that we almost always devour half of it while deep frying itself.
  3. For the sauce, take 2tbsp oil in a pan. Add 1 tbsp cumin seeds, 10 flakes of chopped garlic (you can add more garlic if it suits your taste), 2 twigs of curry leaves, 1tbsp ginger garlic paste, 1tbsp each of pepper powder, cumin powder and chilli powder. Saute till the raw taste of masalas is gone.
  4. Add red chilli garlic paste. You can either buy it at a store or make it at home. For this boil water and add around 5 Kashmiri red chillies and around 10 flakes of garlic and then grind them to a thick paste in a mixer.
  5. Saute the paste. Drop a few drops of water. Toss the chicken and cook for around 5 mins.
  6. I also add 2-3 onions cut into 1 inch cubes and separating the layers along with the chicken. This gives some volume to the dish and the onions taste good with the sauce.
This dish has a south Indian taste to it and its main flavours are from pepper, garlic and curry leaves. Hence use fresh ingredients and in generous quantities. The dish at restaurants has a characteristic red colour which comes from the red chilli garlic paste. You may add food colour but I avoid it.

Tawa fried Paneer Tikka


This is a simple started I like to make when I dont have enough time for elaborate cooking.

Method

  1. Cut 250 gms paneer into 1 inch cubes
  2. Marinate with 1 cup thick curd, 1 tsp garam masala, 1 tsp ginger garlic paste, 1tsp red chilli powder for an hour.
  3. Shallow fry on a non stick pan with little oil. Dont let the sides burn.
If the paneer you have bought from the stores is very hard, soak it in hot water with a little bit of turmeric and salt for 5 mins, drain the water and then cook.

This is a traditional Konkani recipe and I always end up cooking this dish when there are no vegetables in the fridge and I have only have potatoes and onions left.

Method

  1. Boil 3 medium sized potatoes with the skin on. Cut them into big (around 1-2 inch) pieces.
  2. Add 2 tsp oil in a pan.  Add  2 medium sized onions chopped finely. Saute till it is pinkish in colour
  3. Take a different pan and dry roast 1 cup freshly desiccated coconut, 1 tsp coriander seeds and 2-3 red chillies. Grind in mixie with a small marble size ball of tamarind and water. Add this thick paste to the onions and sauté till the rawness of spices is gone. Add salt to taste.
  4. Add the boiled potatoes and water and cook the dish till the gravy is ready.
  5. Keep the gravy slightly thick and use this as a side dish with rice. I use coconut oil in this dish as it gives a beautiful flavour to the curry.

Methi Chaman


As a child I never liked methi or spinach. But now that I have to cook on my own, I have suddenly started liking the taste of spinach and use it almost once a week in my cooking. I tasted this dish in a buffet and liked it so much that I searched for this recipe the same day. I have made it many times now and it is the perfect dish to eat with chapattis.

Here is my recipe for this dish
  1. Blanch 2 cups of spinach and 1 cup of methi leaves (for blanching, boil water and soak the leaves for 5 mins and drain). Blend in a mixer  along with 2 green chillies to get a fine puree.
  2. Add 2 tsp oil in a pan. Add 1 tbsp cumin seeds to it and sauté
  3. Add 1 bay leaf, 2-3 cloves, 1-2 cardamom, 1inch cinnamon
  4. Add 2 medium sized onions  and 5-6 garlic flakes neatly chopped and sauté till onion is brown.
  5. Add a pinch of turmeric, ginger garlic paste. Add the puree and sauté. Add 1 tsp coriander powder and a pinch of sugar and cook till the oil separates.
  6. Now adjust the water and salt according to your taste
  7. Add 200 gms of grated paneer and cream and cook for 10 mins on a low flame
Add 1 tsp garam masala and garnish with coriander and cream and serve.

Crabs are my all time favourite. Whenever I have a trip planned to Mumbai, I ask my mom to keep the crab curry ready - that is my sole demand on each of my visit.  Here is my mom's recipe for Kurle Ambat

Method

  1. Clean the crabs. I still haven’t mastered this art and get it cleaned from the place where I buy the crabs. I just wash the crabs thoroughly before starting
  2. In a small pan take 1 tbsp oil and  roast 1 tsp coriander seeds and 4-5 red chillies. Grind in the mixer with 1 cup freshly desiccated coconut , a pinch of turmeric and 1 marble sized ball of tamarind. Grind this to a fine paste as finer the paste better the taste.
  3. In a large pan, add 2 tsp oil.
  4. Fry 2 medium sized onions till pink. Now add crabs and sauté for a minute. Add the masala and salt and cook. Crabs take around 15 mins to cook on medium flame. Serve hot with rice.
  5. The crabs almost always taste better the next day after absorbing all the masala.

The crab available is Mumbai is much more meatier than the ones available in Hyderabad. I havent verified this personally but it is also said that crabs should be bought when alive as they start losing their body fat and flesh after losing life.
Mud crab that is easily available in Mumbai (http://en.wikipedia.org/wiki/Scylla_serrata)


The blue crab which we get here in Hyderabad (http://en.wikipedia.org/wiki/Crab_fisheries)

Onion Tamboli


This is one quick Konkani dish to cook and requires no heating. This goes well with rice.

Method

1. Grind together 1 onion,1 cup grated coconut, 1 marble sized ball of tamarind, and 3 dried red chillies to a very smooth paste, adding sufficient water and salt. The consistency should be thinner than chutneys as this is used as a substitute for curry with rice.

Fine pieces of onion and ginger can also be added in the end to give it a crunchier texture.

Jackfruit (Phanas in Konkani) is one key ingredient in Konkani Cooking. Raw jackfruit (Kadgi in konkani, kathal in hindi) is cooked with a lot of different pulses in our curries. The seed of jackfruit is dried and stored and again added to pulse gravies. But my favourite is the sweet ripe jackfruit pods. I can never have enough of this. I also like to cook these jackfruit fritters and store them in the refrigerator so that I can eat the jackfruits for a longer time. We get these ripe jackfruit in summers and then in the early rainy season.
  1. Grind around ripe 20 Jackfruits pods in a mixie to get a coarse paste. Add 2 tbsp Rava (Semolina), 2 tbsp Coconut grated.
  2. Add salt according to taste. Add jaggery in case the dough is not sweet enough. Make it into a cake dough like consistency.
  3. Heat oil in a kadhai. Make small balls of the dough and deep fry. Cook on low flame for the jackfruits to cook thoroughly. Traditionally we do not add any water in this dough. However if you find it difficult to make the balls, you can sprinkle a little bit of water. Also you can dip your fingers in water before making the balls so that they don’t stick to your hand.
  4. When the fritters are brown on the outside, remove them on a tissue paper and serve hot.
  5. One can also store these for 4-5 days in the refrigerator
The jackfruit fritters in the picture is slightly browner than golden because of jaggery.
I like to keep the jackfruits coarse and don’t overgrind it as I like to bite into the jackfruit while eating the mulik. Sometimes I add freshly cut jackfruit pieces into the batter just for the extra texture.

Boost your productivity by reading more in less time.